
DIY Clamp Storage Rack Ideas

Every woodworker knows the struggle of the "clamp pile." It starts with a few spring clamps on a shelf, then a couple of bar clamps leaning against the wall, and before you know it, you have a tangled mess of steel and plastic that falls over every time you try to grab one. Learning how to store woodworking clamps isn't just about tidiness; it’s about protecting your investment and ensuring your glue-ups go smoothly. When the glue is drying and you need that one specific F-clamp, the last thing you want to do is dig through a heap of metal.
In this guide, we will explore the most efficient DIY clamp storage rack ideas, from simple wall-mounted combs to mobile A-frame carts. You will learn the physics behind supporting heavy parallel clamps, how to maximize your vertical wall space, and which materials are best suited for building a rack that won't sag under pressure. Whether you have a massive professional shop or a small garage corner, these organization strategies will help you regain control of your workspace.
By the end of this article, you’ll have a clear plan for building or buying a storage system that fits your specific collection. We’ll cover the pros and cons of various designs, provide actionable construction tips, and help you avoid the common mistakes that lead to broken racks or damaged clamps. Let's dive into the world of workshop organization and get those clamps off the floor once and for all.
Table of Contents
- The Importance of Dedicated Clamp Storage
- Choosing the Best Location for Your Racks
- DIY Wall-Mounted Rack Designs
- Mobile Clamp Carts for Large Collections
- Materials and Construction Best Practices
- Commercial vs. DIY: Which is Right for You?
- Pro Tips and Common Mistakes
- Frequently Asked Questions
The Importance of Dedicated Clamp Storage
Properly storing your woodworking clamps is a fundamental aspect of shop efficiency that many beginners overlook. Clamps are heavy, awkwardly shaped, and often top-heavy, making them a safety hazard if they are simply leaned against a wall. A dedicated rack ensures that each tool has a specific home, which significantly reduces the time spent searching for the right size during a critical glue-up. In woodworking, timing is everything; once the glue is spread, you have a limited window to get your project under pressure. An organized rack allows you to grab what you need with one hand, keeping your workflow fluid and stress-free.
Beyond efficiency, a well-designed storage system protects the longevity of your tools. Clamps that are piled on top of one another can suffer from bent bars, chipped pads, or stripped threads. Parallel clamps, in particular, are precision tools designed to keep jaws perfectly square. If they are dropped or stored in a way that puts lateral pressure on the heads, they can lose their accuracy. By hanging them vertically or supporting them along their bars, you ensure that the weight is distributed safely, preventing long-term damage to the clamping mechanisms.
Finally, a dedicated clamp rack is a massive space-saver. Clamps are notorious for consuming floor space and creating "dead zones" in a workshop. By moving them to the wall or onto a compact mobile cart, you free up valuable square footage for assembly tables or machinery. A clean shop is a safe shop, and removing tripping hazards like long bar clamps from the floor is a major step toward a professional-grade environment. It also makes cleaning much easier, as you won't have to move a dozen heavy clamps every time you need to sweep up sawdust.
Choosing the Best Location for Your Racks
When deciding how to store woodworking clamps, location is just as important as the rack design itself. The ideal spot is within "striking distance" of your primary assembly area. Most woodworkers find that mounting racks directly behind or adjacent to their main workbench is the most effective setup. This minimizes the steps you need to take while holding a heavy project piece in place. However, you must also consider the "swing" of the clamps; long bar clamps require significant clearance to be removed from a rack, so ensure you aren't blocking a walkway or another tool's operating zone.
Vertical wall space is often the most underutilized asset in a small shop. If you have high ceilings, consider mounting your least-used clamps (like extra-long 48-inch bar clamps) higher up, while keeping your everyday F-style and spring clamps at eye level. If wall space is at a premium, look for "dead" spots, such as the space between a garage door track and the wall, or the ends of your lumber storage rack. These areas are often too narrow for shelving but are perfect for a row of vertically hanging clamps.
Lighting and environmental factors also play a role in location choice. Avoid storing clamps in damp corners or directly under leaky pipes, as moisture is the enemy of steel bars. Even chrome-plated or galvanized bars can develop surface rust over time if the humidity is high. If your shop is in a basement or a non-climate-controlled garage, try to place your racks in an area with decent airflow. This prevents moisture from being trapped between the clamp jaws and the bars, ensuring your tools remain rust-free and ready for action.
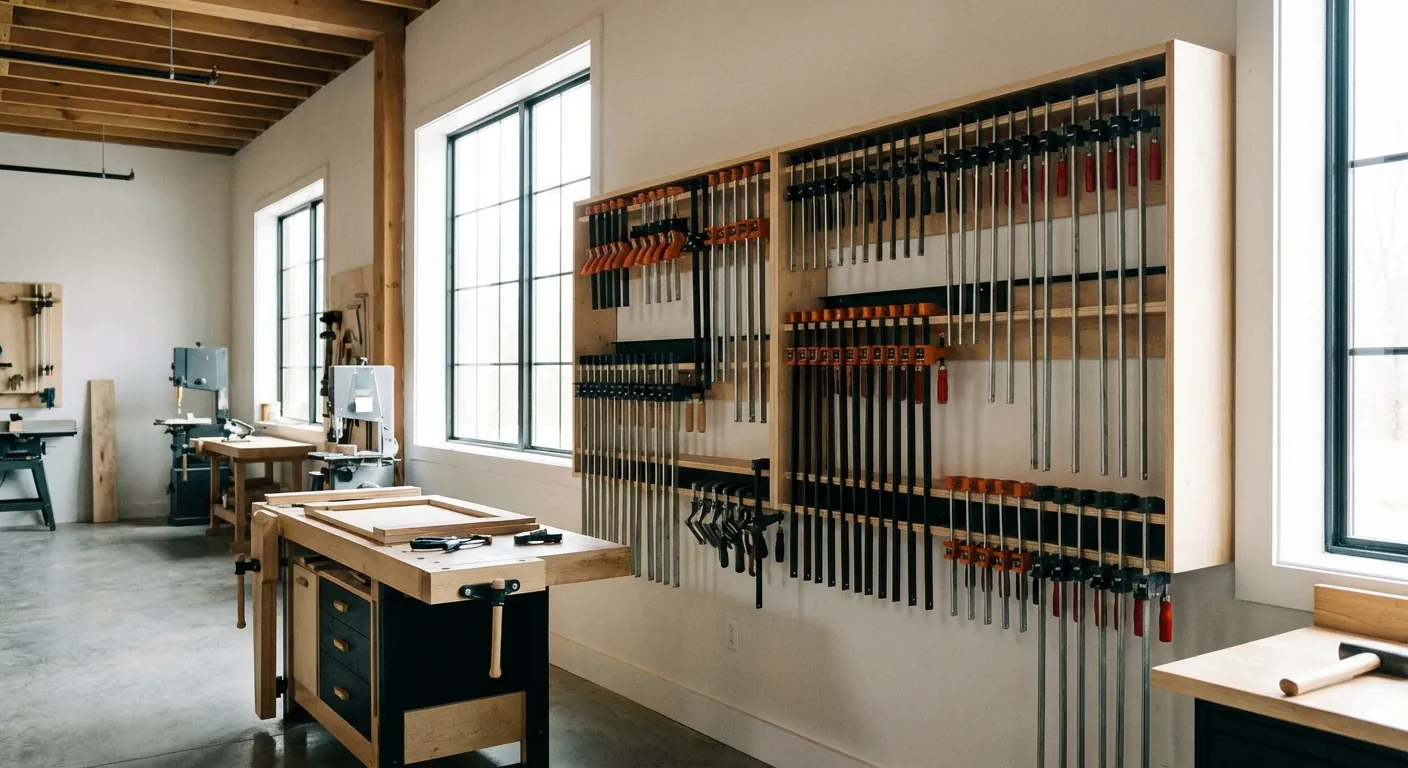
DIY Wall-Mounted Rack Designs
The Parallel Clamp "Comb" Rack
Parallel clamps are the heavyweights of the workshop, and they require a rack that can handle significant downward force. The "comb" design is the most popular DIY solution for these tools. It consists of a thick backer board (usually 3/4" plywood) with several projecting "teeth" or slots. The clamps slide into these slots, supported by the underside of their heads. Because parallel clamps are so heavy, the teeth of the comb should be reinforced with glue and long screws, or even better, built with a slight upward angle to prevent the clamps from sliding forward.
When building this rack, spacing is critical. You want the slots to be wide enough to accommodate the bar easily but narrow enough that the head of the clamp has plenty of surface area to rest on. A common mistake is making the slots too tight, which makes it frustrating to return the clamp to the rack. Aim for about 1/8" of play on either side of the bar. For a professional touch, chamfer the edges of the slots to help guide the bars into place, and consider adding a "stop" block at the front of each tooth for extra security.
Pipe and Bar Clamp Racks
Pipe clamps and standard bar clamps are much thinner than parallel clamps, allowing for a more compact storage design. A simple and effective DIY rack for these involves a "stepped" block design. By mounting two horizontal rails to the wall—one high and one low—you can lean the clamps against the rails. The top rail usually has small notches or dividers to keep the clamps from sliding sideways, while the bottom rail supports the weight. This is often called a "scalloped" rack, and it is incredibly easy to build using a hole saw or a jigsaw.
For those with a large collection of pipe clamps, a "horizontal sleeve" rack is another excellent option. This involves mounting short sections of PVC pipe or wooden blocks with holes drilled through them to the wall. You simply slide the pipe clamp through the holes. While this is very secure, it does require more vertical clearance to pull the clamps out. Most woodworkers prefer the "drop-in" style racks because they are faster to use during a project. Regardless of the style, ensure your wall anchors are rated for the total weight; a full set of pipe clamps can easily exceed 100 pounds.
{{PRODUCT_CARD:B008N6A9R8}} The Rockler 24-Piece Clamp Storage Kit is an excellent choice for woodworkers who want a professional, organized look without the time investment of building a custom rack from scratch. I recommend this kit specifically for those who own a variety of clamp types, as the modular brackets are designed to handle everything from small F-clamps to heavy parallel clamps. The standout feature is the heavy-duty galvanized steel construction, which offers far more durability and weight capacity than plastic alternatives.
This kit is best for intermediate woodworkers who have established a decent collection and want a "buy-it-once" solution. The brackets are pre-drilled for 16-inch on-center studs, making installation a breeze. One minor drawback is that the fixed spacing might not be perfectly optimized for every single brand of clamp, but it fits the vast majority of standard woodworking brands like Bessey and Irwin. Compared to DIY plywood racks, these take up significantly less depth on the wall, which is a huge plus for tight shops. {{/PRODUCT_CARD}}
Mobile Clamp Carts for Large Collections
For shops that lack wall space or for woodworkers who move between different assembly stations, a mobile clamp cart is the ultimate organizational tool. The most common design is the "A-frame" cart. This structure features a wide base with heavy-duty casters and two angled sides that meet at a top ridge. The beauty of the A-frame is its stability; the weight of the clamps is directed downward and inward toward the center of the cart, making it very difficult to tip over. You can mount different styles of racks on each side—parallel clamps on one, and F-style or spring clamps on the other.
When designing a mobile cart, the base should be the heaviest part of the build to maintain a low center of gravity. Many woodworkers use the interior of the A-frame for additional storage, creating shelves for glue bottles, tape, and assembly squares. This turns the clamp rack into a complete "Assembly Station" on wheels. Use 3-inch or 4-inch locking casters; smaller wheels will struggle to roll over sawdust or small wood scraps, and the ability to lock the cart in place is essential when you are pulling heavy clamps off the racks.
Another variation is the "Vertical Tower" cart, which is essentially a tall, narrow box with racks on all four sides. This is perfect for very small shops because it has a tiny footprint. However, it can become top-heavy quickly. To combat this, you can store your heaviest clamps (like 4-way pressure clamps or large pipe clamps) at the very bottom. Always use 3/4" Baltic Birch or high-quality cabinet-grade plywood for these builds, as the constant movement and weight will cause inferior materials like MDF or construction-grade pine to warp or break over time.

Materials and Construction Best Practices
When you're figuring out how to store woodworking clamps, the choice of material is non-negotiable: use 3/4" plywood. While it might be tempting to use scrap 2x4s or pine boards, plywood’s cross-grain lamination provides the structural integrity needed to prevent the "teeth" of your racks from snapping off. Baltic Birch is the gold standard because it has more layers and fewer voids than standard big-box store plywood, offering superior screw-holding power. If you are building a rack for heavy parallel clamps, consider doubling up the thickness of the support arms by gluing two pieces of 3/4" plywood together.
Fasteners are another critical component. Never rely on glue alone for a clamp rack. The constant vibration of the shop and the heavy impact of placing clamps on the rack can eventually break a glue bond. Use long, high-quality wood screws (like GRK or Spax) that bite deep into the wall studs or the backer board. If you are mounting to drywall, you must find the studs. Plastic drywall anchors are not sufficient for the weight of a clamp collection. If your stud spacing doesn't align with your rack design, mount a 3/4" plywood "cleat" to the studs first, then mount your racks to that cleat.
Lastly, consider the finish. While it might seem overkill for a shop fixture, applying a simple coat of polyurethane or even just paste wax to the "fingers" of your rack can make a big difference. It reduces friction, allowing clamps to slide in and out more smoothly. It also protects the wood from the oils and resins that can build up on clamp bars over time. Softening all the sharp edges with a 1/8" round-over bit or some sandpaper will also prevent splinters and make the rack much more comfortable to use during a busy project.
Pro Tips and Common Mistakes
One of the most common mistakes in clamp storage is over-crowding the rack. It is tempting to squeeze as many clamps as possible into a small space, but if you have to move three clamps to get to the one you need, your system has failed. Leave at least an inch of "finger room" between the handles of your clamps. This allows you to get a firm grip on the tool without barking your knuckles on the neighboring clamps. If you have different brands of clamps, group them by brand; often, the head shapes are slightly different, and they will nest together better if they are identical.
Another pro tip is to store your clamps in the "closed" or "nearly closed" position. For F-style and parallel clamps, this keeps the screw mechanism protected and prevents the long bars from sticking out further than necessary. It also makes the clamps more balanced on the rack. For spring clamps, many woodworkers find that clipping them to a simple 1/2" thick strip of wood is the most efficient method. This keeps the springs under slight tension, which actually helps them stay organized and prevents them from "nesting" into a tangled ball.
Finally, don't forget about the "micro-storage" needs. Small spring clamps, layout tools, and specialized edge clamps often get lost in the shuffle of big bar clamps. Dedicate a small section of your rack—or a separate drawer—specifically for these items. Labeling your racks by size (e.g., "12-inch," "24-inch") can also be a huge help, especially if you have a large shop where multiple people are using the tools. It ensures that everything goes back to its proper home at the end of the day, maintaining the organization you worked so hard to create.
Frequently Asked Questions
What is the best height to mount a clamp rack? The ideal height for a clamp rack is "shoulder height" for your most frequently used tools. This allows you to reach out and grab a clamp without bending down or reaching uncomfortably high. For most woodworkers, this means the support "fingers" of the rack should be between 50 and 60 inches from the floor. This height also leaves enough room underneath for a workbench or lower storage cabinets, maximizing your wall's utility.
However, if you are storing very long bar clamps (48 inches or longer), you may need to mount the rack higher to keep the ends of the bars from hitting the floor. In this case, ensure the rack is still low enough that you can safely lift the heavy head of the clamp off the support without straining. Always prioritize the safety of the lift over the aesthetic of the wall.
Can I store clamps horizontally instead of vertically? Yes, you can store clamps horizontally, but it is generally less space-efficient. Horizontal storage often involves "stacking" clamps on deep brackets, which means you have to remove the top clamps to get to the ones on the bottom. This is a major workflow killer. Horizontal storage is best reserved for very long clamps that simply won't fit vertically due to ceiling height constraints.
If you must store them horizontally, try to use a "staggered" bracket system where each clamp has its own dedicated level. This prevents the stacking issue but requires a lot of wall real estate. For 90% of workshops, vertical storage is the superior choice because it utilizes the "dead space" high on the walls while keeping the tools accessible.
How do I prevent my DIY plywood rack from sagging? Sagging is usually a result of using material that is too thin or failing to support the "fingers" of the rack properly. To prevent this, always use at least 3/4" thick plywood. For heavy parallel clamps, you can add a "gusset" or a triangular support piece underneath each finger. This transfers the downward weight back into the vertical backer board and the wall studs.
Another trick is to build the rack with a slight "rake" or upward angle (about 2-3 degrees). This compensates for any natural deflection in the wood and ensures that the clamps stay seated against the backer board rather than sliding toward the edge. Using a high-quality wood glue in addition to mechanical fasteners will also create a much stiffer joint that is less likely to sag over time.
Is it better to build a rack or buy a metal one? This depends on your priorities. Building a DIY rack is much cheaper and allows you to customize the spacing perfectly for your specific collection. It’s also a great "shop project" to hone your skills. However, DIY wood racks are bulkier than metal ones. If you have a very small shop where every inch counts, a commercial metal rack (like the Rockler or Bora models) offers a much thinner profile and higher weight density.
Commercial racks are also more durable in the long run. Steel won't wear down from the constant friction of sliding metal clamp bars in and out, whereas wooden slots can eventually become chewed up. If you have a massive collection of 20+ heavy parallel clamps, the peace of mind that comes with a powder-coated steel rack is often worth the investment.
How should I store pipe clamps specifically? Pipe clamps are unique because they are perfectly round and tend to roll or slide. The best way to store them is in a "notched" rack where the pipe sits in a semi-circular cradle. This prevents side-to-side movement. Alternatively, many woodworkers store them by "clamping" them onto a 3/4" thick board mounted to the wall. While this is very secure, it can be slow because you have to unscrew and screw the clamp every time you use it.
A "drop-in" style rack with a hole slightly larger than the pipe diameter is often the best compromise. You slide the pipe through the hole, and the "clamping head" sits on top of the wood. This is very secure and allows for quick one-handed retrieval. Just make sure the wood is thick enough to support the weight of the heavy iron pipe without splitting.
Our Top Picks for 2026
We've spent hours researching and testing to find the absolute best options currently available.

DIYLOG Corner Clamp for Woodworking, 90 Degree Corner Clamp, 4 Pack 5.5"x 5.5" Aluminum Alloy Right Angle Woodworking Tools, Positioning Squares for Picture Frame, Box, Cabinets, Drawers 4Pack Set*box(5.5")
- 【90 Degree Wood Working Tools and Equipment Precision Angle Clamp】Made of high quality aluminum alloy to ensure 90 degree precision, Square wood clamps for Woodworking right angle positioning tools with plastic toolbox. the surface is red anodized, anti-rust and corrosion-resistant, CNC processing makes it more durable.
- 【Corner Clamp are Widely Used】The wood clamps for woodworking L has slightly chamfered edges that won't scratch your hands and woodwork to help level them during gluing, splicing, welding. Check and correct for 90 degree angles on wood, countertops, saw blades, etc. right angle clamp are a great tool to make woodworking projects easier.
- 【The Sales Status and Actual Use of Woodworking Angle Clamps Show That】(140mm/5.5 inch) Woodworking tools and accessories are a very scientific size choice. Ideal for assembling frames: picture frames, drawers, cabinets, furniture cabinets, birdhouses, mailboxes, or maintaining any object you want to keep perfectly square at 90 degrees.

HORUSDY 8-Pack Bar Clamps for Woodworking, 12" and 6" Bar Clamps, Wood Working Clamp Sets, Quick Clamps F Clamp with 150 LBS Load Limit (8-Pack Wood Clamps) 6" Bar Clamps,12" Bar Clamps,6" Spring Clamps 8-Pack
- 1. The complete set includes 4pcs 6" bar clamps,2pcs 12" bar clamps and 2pcs 6" spring clamps, which can meet different needs.
- 2. 6" clamps are suitable for spreaders up to 11-9/64" and 12" clamps are suitable for spreaders up to 17-21/64", which can provide customers with more choices.
- 3. Strong nylon body and high-quality hardened steel bar have good impact resistance and can fully withstand the high frequency of use at the construction site.

WETOLS Corner Clamp for Woodworking, 90 Degree Right Angle Clamp, Wood Clamps, 4Pcs Adjustable Spring Loaded Woodworking Clamp, Gifts for Dad, Birthday Gifts for Men, Photo Framing, Orange
- Cool Gadgets Gifts for Men: WETOLS corner clamp comes with a nice gift box, which can be great gifts for Men Dad Husbands Grandpas. A set of 4 wood clamps is perfect for aligning, nailing, woodworking, welding, screwing, making cabinets, box, and picture reinforcement, wooden DIY projects, etc
- Adjustable and Accurate: Fast fixing wood boards and frames at an angle of 90 degrees. Fit boards with a thickness of 3/16" - 3/4" for 90-degree corners and T-joints
- Superior quality: The WETOLS corner clamp for woodworking is made of premium quality polyamide material, which is durable for long service life