
How to Build a Mobile Lumber Cart

Table of Contents
- The Importance of Mobile Lumber Storage
- Selecting the Best Design for Your Workshop
- Essential Materials and Hardware Requirements
- Step-by-Step Construction Guide
- Maximizing Every Square Inch of Your Cart
- Safety Considerations and Weight Distribution
- Pro Tips and Common Mistakes
- Frequently Asked Questions
The Importance of Mobile Lumber Storage
Every woodworker eventually faces the "lumber lean"—that precarious stack of boards propped against a wall that seems to grow exponentially with every project. While it starts as a convenient way to keep offcuts within reach, it quickly transforms into a safety hazard and a major source of workshop frustration. Storing lumber flat on the floor or leaning against damp garage walls can lead to significant warping, cupping, and twisting, effectively ruining expensive hardwoods before you even have a chance to plane them. A dedicated mobile lumber cart solves this by providing a structural frame that supports the wood properly while keeping it off the ground.
Beyond protecting your inventory, a mobile cart is a game-changer for workshop workflow. In a small shop, space is your most valuable commodity. Static storage racks take up permanent real estate, but a cart on heavy-duty casters allows you to reclaim that floor space whenever necessary. Whether you need to move your entire wood supply to the center of the room for a massive milling session or push it out of the way to park a car, mobility gives you the flexibility that fixed shelving simply cannot offer. It turns a cluttered obstacle course back into a functional workspace.
Furthermore, organizing your materials on a cart allows for better inventory management. When lumber is buried in a pile, you tend to buy new boards because you can't find (or reach) the ones you already have. A well-designed cart features specific zones for sheet goods, long dimensional lumber, and small offcuts. By having a clear view of your "stock," you reduce waste and save money. This guide will walk you through the essential elements of diy lumber cart plans so you can build a solution tailored to your specific tool layout and material needs.
Selecting the Best Design for Your Workshop
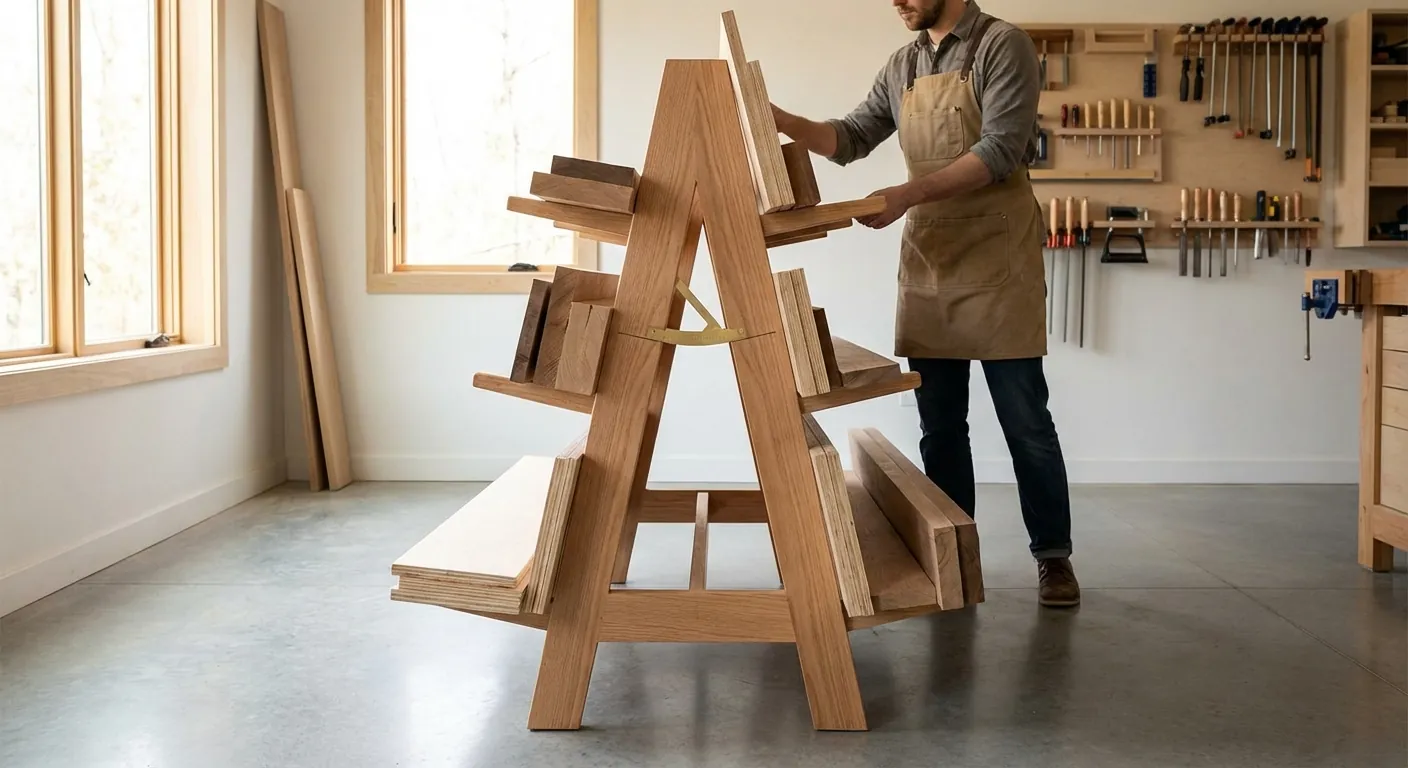
Choosing the right diy lumber cart plans depends heavily on the types of projects you typically undertake. If you frequently build cabinetry or large furniture, your cart must prioritize sheet goods like 4x8 plywood. For these makers, an "A-frame" design is often the gold standard. The angled center support allows full sheets to lean securely against the frame, preventing them from tipping over while keeping the footprint narrow enough to fit through standard doorways. On the opposite side of the A-frame, you can install horizontal arms for long boards or bins for shorter pieces, making it a truly multi-purpose station.
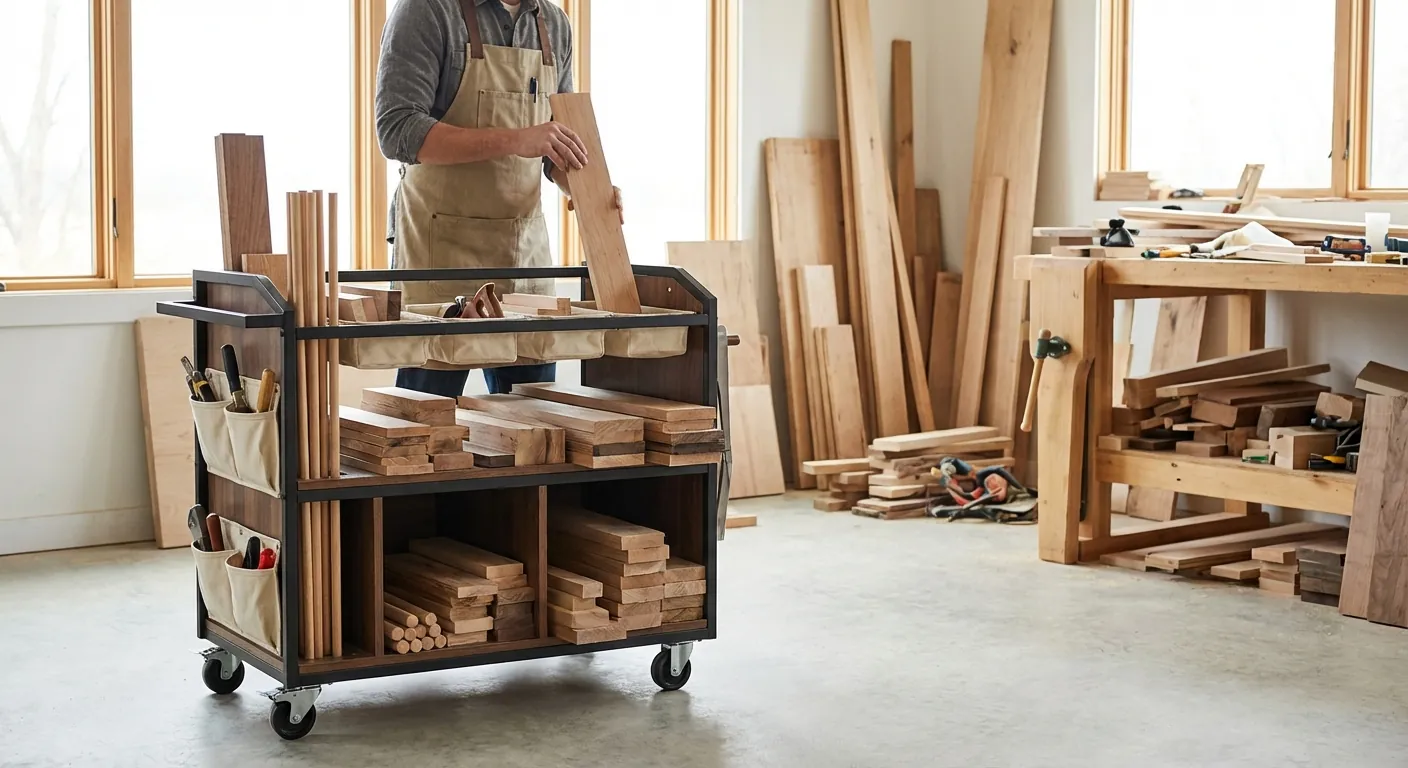
Alternatively, if you primarily work with dimensional lumber or live-edge slabs, a vertical or "pantry-style" cart might be more effective. These designs focus on deep, horizontal shelving that can support the weight of heavy oak or maple without sagging. The key here is to ensure the base is wide enough to prevent the cart from becoming top-heavy. Many woodworkers prefer a "hybrid" approach, where one side of the cart features a large pocket for plywood and the other side utilizes a series of dowels or 2x4 arms to stack boards by species. This ensures that your most-used materials are always accessible without having to dig through a mountain of wood.
Vertical vs. Horizontal Storage Dynamics
Vertical storage is often praised for its space-saving qualities, but it requires careful consideration of ceiling height and board stability. When you store long boards vertically, they are easier to "flip through" like a deck of cards, allowing you to see the grain and color of every piece. However, if the boards are not supported at multiple points, they can bow over time. Vertical bins are best suited for offcuts and boards under six feet in length. For anything longer, horizontal storage is superior for maintaining the flatness of the wood, provided the support arms are spaced no more than 16 to 24 inches apart.
Footprint and Maneuverability
When reviewing diy lumber cart plans, always measure your shop's "traffic lanes." A cart that is too wide will become a permanent fixture because it's too difficult to navigate around stationary tools like table saws or jointers. Most successful shop carts maintain a width of 24 to 30 inches. This is wide enough to provide a stable center of gravity for 4x8 sheets but narrow enough to tuck against a wall. Additionally, consider the height of your cart; it should be low enough to clear any overhead garage door tracks or hanging lights, especially when it is fully loaded with your tallest boards.
{{PRODUCT_CARD:B07B71N19L}} I highly recommend these 4-inch Heavy Duty Swivel Casters for any mobile lumber cart project. When you're dealing with hundreds of pounds of hardwoods and plywood, cheap plastic wheels will flat-spot or snap under the pressure. These casters feature a dual-locking mechanism that freezes both the wheel rotation and the swivel base, ensuring your cart stays exactly where you put it during loading.
They are best for intermediate to large carts where the total weight could exceed 600 pounds. The polyurethane wheels are non-marring, which is essential if you have a finished shop floor or a painted garage surface. The standout feature is the ease of movement; even when the cart is fully loaded, these casters glide over small shop debris and cracks without catching. One drawback is that they do add about 5 inches of height to your cart, so you'll need to account for that in your initial design to ensure your lumber doesn't hit the ceiling. Compared to standard hardware store casters, these offer a much higher load rating and better long-term durability. {{/PRODUCT_CARD}}
Essential Materials and Hardware Requirements
The structural integrity of a lumber cart is paramount because wood is deceptively heavy. A single sheet of 3/4-inch MDF can weigh nearly 90 pounds; stack ten of those on a cart, and you are already approaching a thousand pounds before adding any hardwood. For this reason, I recommend using a combination of 3/4-inch cabinet-grade plywood for the panels and 2x4 or 4x4 construction lumber for the base frame. Plywood offers excellent shear strength, which prevents the cart from "racking" or leaning sideways under a heavy load. Avoid using particle board or thin OSB, as these materials will crumble at the pressure points where casters are attached.
Hardware is where many DIYers try to cut corners, but it is the most common point of failure. You must use high-quality, 3-inch deck screws or lag bolts for the primary frame construction. Pocket hole joinery is popular for its speed, but for a heavy-duty lumber cart, I suggest reinforcing pocket holes with wood glue and structural screws. The base of the cart should be a "torsion box" or a heavily braced frame to ensure it stays perfectly flat. If the base flexes, the casters will become misaligned, making the cart nearly impossible to push and potentially causing it to tip.
Finally, don't overlook the importance of the casters. As mentioned previously, the load rating of your wheels must exceed the projected weight of your lumber plus the weight of the cart itself. For a standard mobile cart, four 4-inch or 5-inch casters are the minimum. I always suggest using "total lock" casters on all four corners. If you only lock two wheels, the cart can still pivot or "walk" when you are trying to slide a heavy sheet of plywood off the side. The extra investment in premium hardware pays off the first time you need to move a ton of wood with one hand.
Step-by-Step Construction Guide
The first step in executing your diy lumber cart plans is building the base. Start by creating a rectangular frame from 2x4s, using cross-members every 12 inches. This prevents the plywood floor of the cart from sagging. Once the frame is assembled, glue and screw a 3/4-inch plywood deck to the top. This creates a rigid platform. Flip the base over and install your casters. Pro tip: Use carriage bolts or heavy lag screws with washers to mount the casters, rather than simple wood screws, to ensure they never pull out of the wood under stress.
Next, construct the central "spine" or A-frame. This is the vertical structure that will support your sheet goods and boards. If you are building an A-frame, cut two large plywood triangles or use 2x4 studs angled at approximately 10 degrees. This slight angle is crucial; it ensures that the weight of the lumber leans inward toward the center of the cart, increasing stability. Connect these vertical supports with horizontal stretchers at the top and middle. This creates a "ladder" frame that is incredibly strong and provides multiple points for you to strap down lumber if you ever need to transport the cart in a vehicle.
Once the main frame is secure, add the storage features. On the sheet goods side, add a 4-inch wide "lip" or "pocket" at the base to prevent plywood from sliding off. On the opposite side, install horizontal arms for dimensional lumber. You can make these arms from leftover 2x4 scraps or heavy-duty dowels. Ensure the arms are slightly tilted upward (about 2-3 degrees) so that boards don't vibrate off the cart when it's being moved. Finally, add a small bin at one end of the cart specifically for offcuts. This prevents small scraps from cluttering the main shelves and keeps them within easy reach for smaller projects.
Maximizing Every Square Inch of Your Cart
A great lumber cart does more than just hold boards; it organizes them logically. To maximize space, consider adding a "hidden" storage area in the center of the A-frame. The void between the two angled walls is the perfect place to store long, thin items like dowels, copper pipes, or T-track extrusions. You can simply cap the ends of the A-frame with plywood and cut circular holes to create a "quiver" for these awkward items. This utilizes space that would otherwise be wasted and keeps fragile trim pieces from getting snapped or crushed by heavier lumber.
Another way to increase efficiency is to utilize the ends of the cart. The flat vertical surfaces at the front and back of the cart are prime real estate for tool storage or small bins. You can mount a power strip for charging batteries, or install a few "PVC holsters" to hold your tape measures, pencils, and safety glasses. Some woodworkers even mount a small folding workbench or a sacrificial "clamping wing" to the side of the cart. This turns your storage solution into a mobile workstation, allowing you to prep your lumber exactly where it's stored.
Organizing by Size and Species
To keep your shop running smoothly, organize your lumber by thickness and species. I like to use the bottom-most shelves for the heaviest, thickest slabs (like 8/4 oak) to keep the center of gravity low. The middle shelves are ideal for 4/4 "project wood" like walnut or cherry, while the top shelves hold lightweight trim and moldings. Labeling each section with a simple piece of masking tape or a chalkboard-painted strip can save you minutes of measuring every time you need a specific board. It also makes it much easier to perform a quick inventory check before heading to the lumber yard.
Incorporating Scrap Management
Scrap wood is the bane of shop organization, but it’s too valuable to throw away. Integrate a "tiered" scrap bin into your cart design. The lowest bin should hold pieces 12-24 inches long, while a smaller upper bin can hold the tiny "keepers" under 12 inches. By separating scraps by size, you can quickly find a piece for a jig or a small box without digging through a deep, dark bin. If a scrap doesn't fit in the designated bin, it's a sign that it’s time to move it to the firewood pile or the trash, keeping your cart from becoming an overgrown mess.
Safety Considerations and Weight Distribution
Safety is the most critical aspect of any mobile shop project. A fully loaded lumber cart can weigh as much as a small car, and if it tips, it can cause serious injury or significant property damage. The most important rule is to keep the weight as low as possible. Never store your heaviest slabs on the top racks. Always load the bottom shelves first, and try to balance the weight between the left and right sides of the cart. If you have five sheets of 3/4-inch plywood on one side and nothing on the other, the cart becomes a tipping hazard, especially when moving over uneven floors.
When moving the cart, always push from the center of the frame, never from the top of the lumber. Pushing from the top creates a lever effect that can cause the casters to catch and the whole unit to flip forward. It’s also vital to ensure your shop floor is clear of large wood chips or offcuts before moving the cart. Even a small 1-inch block of wood can stop a caster dead in its tracks, causing the momentum of the heavy lumber to carry the cart over. Regular floor maintenance isn't just about cleanliness; it's a fundamental part of safely operating mobile shop furniture.
Finally, consider the environment where the cart will live. If your shop has a sloped floor (common in many garages for drainage), always park the cart with the wheels locked and positioned perpendicular to the slope. Never leave a loaded cart on an incline without all four casters locked. If you live in an area with high humidity, ensure your cart design allows for some airflow between the boards. Stacking wet or green lumber tightly on a cart without spacers (stickers) can lead to mold and rot, which ruins the wood and can eventually weaken the wooden structure of the cart itself.
Pro Tips and Common Mistakes
One pro tip for a long-lasting cart is to apply a simple finish to the plywood surfaces. A quick coat of paste wax on the "pockets" where sheet goods sit will make it much easier to slide heavy plywood in and out. You should also consider rounding over all exposed edges with a router or sandpaper. This prevents splinters when you're reaching for a board and protects your expensive hardwoods from getting dinged or scratched by sharp cart corners.
A common mistake is building the cart too tall. While it’s tempting to utilize all the vertical space in your shop, remember that you have to lift the boards onto the rack. If the top shelf is 7 feet high, you'll be struggling with heavy lumber above your head, which is a recipe for a back injury. Keep your most frequently used shelves between waist and shoulder height. Another mistake is neglecting the "swing" of the casters. Make sure the casters are mounted far enough apart that they can rotate 360 degrees without hitting each other or the frame of the cart.
Lastly, don't overcomplicate the design. The best diy lumber cart plans are often the simplest ones. Focus on stout joinery and high-quality wheels. You can always add more bells and whistles later, but the core of the cart needs to be a tank. If you find the cart is getting too heavy to move comfortably, it might be time to build a second, smaller cart for specific species rather than trying to cram everything into one massive unit.
Frequently Asked Questions
What is the best wood to use for a lumber cart? For the structural frame, 2x4 kiln-dried Douglas Fir or Pine is excellent due to its strength-to-weight ratio and affordability. For the panels and shelving, 3/4-inch plywood is the superior choice. Avoid MDF for the main structure because it doesn't hold screws well under the vibration of being moved and can sag over time. Using high-quality plywood ensures the cart remains square and rigid even when fully loaded with hundreds of pounds of wood.
How many casters do I really need? For a standard 4-to-6-foot long cart, four casters are usually sufficient as long as they are rated for the weight. However, if you are building a cart longer than 6 feet, adding a third pair of casters in the center can prevent the base from bowing. If you use six casters, make sure the center ones are slightly lower (or shimmed) to allow the cart to pivot easily, similar to how a large industrial cart operates.
Can I store my lumber cart in an unheated garage? Yes, but you must be mindful of moisture. If your garage floor gets damp, the mobile cart is actually better than floor storage because it keeps the wood elevated. However, rapid temperature changes can still cause wood movement. To protect your lumber, try to keep the cart away from the garage door where the most drastic temperature swings occur, and consider covering the lumber with a light tarp if the garage is particularly dusty or damp.
How do I prevent the cart from tipping when loading plywood? The key is the "A-frame" angle and the width of the base. A 10-degree lean ensures the center of gravity stays over the middle of the cart. When loading a heavy sheet, always try to have at least some weight on the opposite side of the cart first. If the cart is empty, stand on the opposite side of the base or have a helper hold the frame steady as you lean the first heavy sheet of 3/4-inch material into the pocket.
Should I store boards horizontally or vertically? Horizontal storage is generally better for the long-term health of the wood, as it prevents bowing and allows for even support. However, vertical storage is much more convenient for "browsing" your inventory. A hybrid design is usually best: use horizontal racks for your long, expensive hardwoods and vertical bins for your shorter offcuts and sheet goods. This gives you the best of both worlds in terms of wood preservation and accessibility.
Our Top Picks for 2026
We've spent hours researching and testing to find the absolute best options currently available.

Harvest Your Own Lumber: How to Fell, Saw, Dry and Mill Wood
- Top-tier performance in real-world testing
- Premium materials and exceptional build quality

Basic Lumber Engineering for Builders
- Top-tier performance in real-world testing
- Premium materials and exceptional build quality

The Complete Guide to Portable Sawmills: From Logs to Lumber Anywhere: Everything You Need to Know About Choosing, Setting Up, and Mastering Portable Sawmills for Homesteads (Forest to Workshop)
- Top-tier performance in real-world testing
- Premium materials and exceptional build quality